Once upon a few years ago I was given two mid-70s Midas mixing desks that had been rescued from a slow death in a Wiltshire shed. They sat on the floor of my studio at the time (a roof space in an old malthouse in Bristol) and I would occasionally plug the bigger one in (a 36 module frame) and record various things through it for a different flavour. I became increasingly excited by the idea of restoring and modifying the desk to suit my own needs and whims as I found the raw sound very pleasing, especially the way it distorted – I have often turned it into a feedback synth as it produces rich oscillations. What particularly interested me was the potential for creating a studio centre-piece that would both inspire and limit my work so that a sonic character could be established and explored without investing the kind of session time that a large frame mixer can cost. The majority of the input channels are the PR003 type which have a simple three band EQ: fixed frequency high and low shelves and an inductor based mid-peaking EQ with three selectable frequencies (1.6kHz, 3kHz and 6kHz). There are two PR004s which offer more EQ options, but no sweepable parametrics. Each channels has two ‘foldback’ sends and two ‘echo’ sends and can be assigned to two of the four group busses…simple stuff.
The Midas PR series was constructed to custom orders and made from the premium components of the day: Penny and Giles faders (wirewound!), WIMA and Erie capacitors, Welwyn resistors, Sowter transformers, Plessey switches, Bourns pots and Ernest Turner VUs. The signal paths are short due to the simplicity of routing and EQ and the number of gain stages are few, which is all good news for audio quality. The only real negative aspect is the use of ICs for most of the gain stages, though the critical preamps and group summing amps are all discrete. In the mid to late 70s the quality of ICs was not what it is today and this Midas PR uses UA748s, which were superseded by the all-conquering NE5534 in the 80s and is still going strong today. The PR003 and PR004 input modules that make up 24 channels of the desk I am rebuilding use three ICs each for EQ buffering and final output (i.e. mostly unity gain roles) and are relatively innocuous in their effect. Nevertheless the UA748 is not neutral in tone and has some serious shortcomings. Having done a variety of qualitative tests I have decided to replace them all with On Semi NE5534ANGs, which significantly improves the frequency response and headroom. The aged electrolytic capacitors are being replaced and the final decoupling caps are being replaced with high quality poly film types, though I have yet to finalise the choice (there are a few listening tests to carry out yet).
As well as IC upgrades and new caps there are plenty of crusty pots and crunchy faders to restore or replace, but there are some more fundamental changes to make. This desk only has four group busses, though there are eight group channels (four have no faders are were probably some form of monitor send), and there is no mix summing buss (i.e. master mix – these desks were mostly spec’ed for live use, most famously Pink Floyd’s Dark Side of the Moon tour). With some rearrangement of the main chassis bussing and by changing the channel routing switches I have managed to make it into an eight buss console with a stereo mix-buss (I managed to get a set of matching Penny and Giles faders to re-equip the four faderless group modules). Of course this means I have had to make my own mix and monitor section which is currently in breadboard form. The mix buss is based around two JFET discrete op amps (DOAs) made by Fred Forrsell (JFET992) and offers masses of clear headroom and output level. Tests so far show a healthy +23dBu output into 600Ω before clipping.
Three of the nine VUs (8x group, 1x PFL) are damaged beyond repair and I have had no luck finding direct replacements (they are large Ernest Turners), but I happened to source four large Shinohara VUs that fit the chassis cutouts, and their different look gives the desk a wee bit more funk-junk factor!
Anyway, I shall no doubt write more (witter on) about this in future posts, so for now here’s some pictures of the Midas PR in various stages of disassembly…

The Midas PR chassis with the four Shinohara VUs sat in position (new holes need to be drilled)

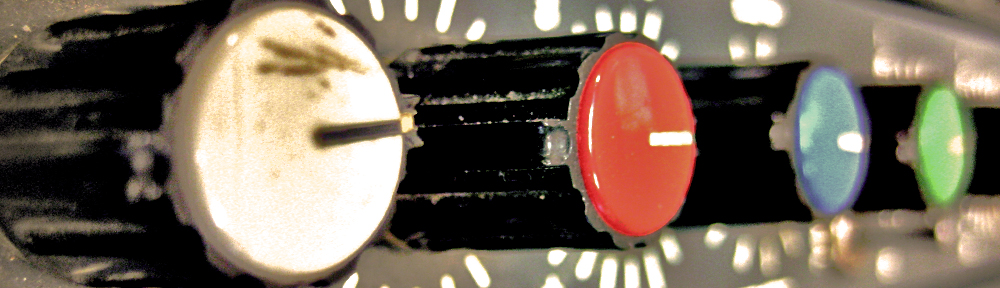
A selection of PR003 input channels. Less is more in knob world – just so long as they’re different colours.

The JFET mix buss and PSU on a breadboard during testing (just one channel). Two foldback/echo modules to the right with their dub-tastic ‘Spin’ knobs which feed the return back into the send…oh yeah!
Nice job Robbie!
Greetings from a Midas junky…
I am working on a PR002 and have some additional PR04/PR40 consoles that I want to convert into a studio console.
I am very interested in your summing amps. My current desks are all equipped with 5534/1034’s (and some to be replaced TL071’s in some eq’s), I am considering going class-A-discrete all the way.
If you like to exchange idea’s, please send me an email.
Best regards,
Theo Balijon
Enschede, The Netherlands
Do you know of anyone with anything from the old PR series for sale? I have a PR04 30 input 10 output monitor desk, all PR 04c modules that I’m restoring and have a friend thats desperate to buy it from me however I’d rather not sell. I’m trying to help track down something for him.
this is an old thread but if your guy is still looking I have a 1979 24/8 Pro4m in case in Colorado
Joe, would like to get info about your board.
P&G’s are plastic conductive ….not wire wound…..I have tons of paperwork if you need any…..I have a small fleet of PR04M’s (3) and a PR05…..the caps in those desks are really good…..don’t just go in there and shot gun them, chances are the caps in there are better than what you’ll get now….I’ve been maintaining these things since 1985….and using them so I’m not just an internet armchair Quarterback 😉
Frank, thank you for the advice. Unless my eyes are deceived the P&G faders (short scale 1kΩ 1820s) in this desk are all wire wound (photos can be provided to satiate incredulity!) – the long scale faders (P&G 1120s) in other modules were conductive plastic. Indeed some of the original caps are excellent and I won’t be replacing them. Many electrolytics have been replaced throughout the desk’s life, often poorly (i.e. splaying radial legs to replace an axial cap), so I have put in good quality alternatives where necessary, and all power rail caps have been replaced as a matter of course (I now know how old they all are – essential to good maintenance in my book). The only other cap switch I have made is putting the output cap back to the original schematic spec, a plastic (poly) film 10uF, as the modules had two back-to-back 100uF lyrics (i.e. 50uF) with the +16v dropped between (via 47kΩ resistor) – the caps used were a mixture of qualities as again it appeared many had been replaced through the last ~37 years. The drop in capacitance (rise in reactance) is a trade-off with the cost of replacing some of the less desirable lytics (both reputation and appearance – some hadn’t fared well!) with two of good modern quality, and gaining a more predictable phase shift characteristic between channels.
Thanks for the paperwork offer – I’ve got a bunch here, and I ended up drawing out my own schematics for the main modules I didn’t have covered. As I’ve been building the studio steadily, whilst also carrying out other audio work, the desk has taken a backseat, so there’s still some work to do before it’s fully integrated: a few group switches to be replaced (I’ve redesigned the functionality here), a few faulty channels to fix up and the mix-buss and monitor circuits/controls to finish building (these are custom jobs). I replaced four faulty Ernest Turner VUs with similar size Shinoharas, and the different aesthetic between them is rather pleasant – also helps identify groups 1-4 and 5-8 more easily! Hopefully next year I’ll finish it all off and post up the results.
All the best,
Robbie.
Frank, I have a pro5 board and am looking for info, parts, advise, would like to talk get in touch with you if possible, as I can’t find any techs who know anything about these old Midas boards.
Hello, I know this is an old post but I’m currently restoring one of these desk with the pr04 modules. A schematic would help for the customer I’m doing the work for is asking for some mods. I plan on using capi gear sum cards for a sum buss. If anyone here has any paper on these I will gladly pay for a copy of circuit diagram or schematics. Any paper work will help. Thank you
OH , also Selco was used in later consoles as far as VU meters after the Turners….I’m looking for one or two myself at this time
Great job! Is it possible to get some drawing about the new PSU ?
Chris , I have a PR05 in our stable . any help or advice or paperwork , just ask email is fporfidio@optonline.net
Hi guys,
I have a 32/8/2 PRO5 (Serial No. 933) I’m restoring, and there’s so little information out here on these wonderful old consoles. Luckily, I’ve the blueprints and modification notes. I’m please to find this discussion, but have nothing to add, really. Happy that you guys are discussing the op amps and caps (I’m wondering how much I’ll have to replace) and just relieved that I’ve found this oasis. I’ve pulled it apart, cleaned and inspected the bucket and all the strips (PR 05C, PR 28C, PR 11A, PR 10A), and finally applied power to it. In the future, my plan is to build a studio around this board.
Cheers,
Rachel
Hi . I am restoring a midas. I am needing schematic of your power supply and channels.
if you can help me you would make me very happy
Hello
I’m Dario, my audio pro, hi-fi laboratory since ’80s is AudioLab ( Leghorn , Italy )
My laboratory is well know and I have as regular customers famous recording studios as well hi-fi entusiast and musicians all around Tuscany
From 2017 I began to restore the strips into a Midas PR05 console. ( White Rabbit Hole recording studio ) : re-cap with Elna Silmic II , replaced IC with OPA134 (without sockets !!) cleaned or replaced pot with same original P11 Wishay, disassembled ( yes disassembled !!!) slider pot and cleaned , and so on…….
The job is not cheap but the final result is a no compromise powerfull , natural , warm and detailed sound for a tight, musical and involving listen
At this moment I’m planning and building a new power supply for the console
I have found schematics only about PR05C and I attempt to reverse engineering the other strips ( not completely )
Obiuvsly I’m looking for schematics and everything about PR05 console
regards
DARIO
There’s a group on Facebook called Long Live Midas Analogue Consoles. Join it and find me there. Rachel Cameron @bitrustler. I have some PR05C blueprints I just restored.
Rachel
Hey!! I have a PR console which I’m restoring now with 03 strips and I would like to put 48v on each channel. I using a soundcraft power supply. The questions is. Is there a trace in the PR 101 socket board which was used for 48v. Is there an option to insert a switch a trace it thorugh the stips PCBs to the xlr input?? Thanks, Martin.
Apologies for the slow reply – I rarely get a chance to do anything with this web/blog site so stuff just stacks up. Anyway, in answer to your question, on the PR101 boards connection 20 of the 25 is generally used for +48v, though due to the customised nature of these consoles as well as the modifications that have happened over the last 40+ years it’s possible this trace has been used for other purposes. I’ve linked two PDFs from schematic scans below to illustrate – see first page of each.


All the best,
Robbie.
Great to find this thread. I’m restoring an old large format Midas PR03 and I-m looking for documentation (schematics) and some extra modules. Please let me know if you can help. necandrei@yahoo.com
I’ll email you shortly.
All the best,
Robbie.
Hi Robbie,
I would like to have more infos on the PR005 pcb and Midas PR002 input channel.
If you are able to help this is my email ad.: elektrun777@gmail.com.
Thank you.
Christophe
Hi Robbie,
I would like to have more infos on the PR005 pcb and Midas PR002 input channel.
If you are able to help this is my email add: elektrun777@gmail.com.
Thank you.
Christophe